Showing posts with label Corner Rounder. Show all posts

Wednesday, March 14, 2012

30 Day Challenge Card # 8 - Everyday Card


Hello everyone! Here's today's card! I wanted to show you a fun shadowing technique that you can use with punched items and die cuts! Have fun reading on!


This is the supplie I used for today! I was testing out my lighting and it was kinda off so sorry for that!!

Stampin' Up! Heart Punch
Stampin' Up! Corner Rounder
EK Succes Heart border punch
Pink Cardstock
Dear Lizzy Paper Pad- Neopolitan
White Gel Pen
Dimensionals


Here I cut the Floral paper 1-1/8 x 5-6/8 and then I trimmed some polka dot paper 1-7/8 x 5-6/8. Then I trimmed the pink cardstock anny x 5-6/8.


Next I punched out 6 hearts. 3 in the floral pattern and 3 in the pink cardstock. I added small dimensionals on the front of the 3 floral hearts.


Now I added the pink hearts on top of the floral hearts.


Here I trimmed the pink cardstock with my heart border punch and adhered it to the back of the floral paper. Then I adhered the polka dot paper on the back of the floral and rounded the corners.
 
 
This is what the finished card should look like! Just adhere the 3 hearts virtically and adhere the design you just made to the card! You could add some white stiching if you'd like I wanted to bring the white out a little more in the card! Thanks for tuning in!


Wednesday, March 7, 2012

30 Day Challenge Day Card # 3 - Friend Medallion


Hey everyone, I decided to stick with the medallion theme today : ). I wanted to make this card a little more masculineish haha minus the hearts.. But I love the punch! hahaha! But any way enjoy the tutorial!


Ok here is the supplies! I forgot to add the heart punch in this oopsies! But it wasn't hard to make!

Little Black Dress 6x6 paper pad
Stampin' Up! Teeny Tiny Stamp Set
White Gel Pen
Stampin' Up! Corner Rounder
Stampin' Up! 3/4 Circle Punch
Stampin' Up! 3 Hearts Punch
Scallop Edge Scissors
Kraft Cardstock
Black Ink
Martha Stewart Circle Cutter

There you go! Oh! and a little disclaimer.. The Marth Stewart Circle punch I use takes some practice to get used to.. I'd suggest putting it on a cuttlebug B Mat where it's raised up. But also the cutter blade is super super sharp so just be Careful! : )


I cut a piece of Kraft Cardstock 1-1/8 x 5 inches. Then I used some of the assorted patterned paper from the paper pad I cut them into various strip sizes. I then added adhesive to the cardstock and layerd the strips of paper diagonally.


The result should look something like this! Finish all the way to the other end layering different patterns next to each other. Once that was finished I turned it around and cut the excess off.


I adhered the patterned design we just made on to the standard        4-1/2 x 5 Kraft cardstock. Then I eyeballed the size of the width of the black cardstock but the length of it is 5 inches long. I then used the scallop scissors and trimmed the edge. I layered it over the strips of paper and adhered it down.


With the Martha Stewart Circle Cutter I cut out the creme patterned paper from the paper pad. The size of the circle is 2-7/16 And then with my circle punch I punched out a bunch of circles. I added adhesive to the edge of the circle and added then all around the edge on the back.


This is what the finished medallion should look like : )


Now add the medallion to the card and trim the edge of the piece hanging off the card.


I stamped in black ink this sentiment.


Finally I punched out hearts and adhered it to the middle of the medallion. I rounded the top orners of the card. Lastly I added some white stitching to the card. I hope you enjoy this card as much as I did! Thanks for tuning in! : )

Stay tuned in for 26 more days of cards!


Tuesday, March 6, 2012

30 Day Challenge Card #2 - Heart Medallion


Afternoon everyone! Today was a beautiful day and it was so sunny and spring is finally here! I'm so excited and happy! So I hope you enjoy this card! Read on for more!


So today! I used these supplies!

Martha Stewart Circle Cutter
Love Me Paper Pad
Stampin' Up! Corner Rounder
Stampin' Up! 3 Hearts Punch
Creme Cardstock
Red Ink Pad
Sentiment of your choice

That's it! : )


Here I cut out 2 circles. The red circle is 2.5 inches and the pink circle is cut at 2 inches. But I decided to cut out 3 more creme circles to off set the hearts I'll be adhering to the circles. One is two sizes smaller than the pink circle, the second one is two sizes larger than the pink circle, and the thrid creme circle is two sizes larger than the red circle. Sorry for the confusion!

I punched out little hearts with my 3 Hearts Punch, I used the zig zag pattern in the Love Me Pad.


Here I took the dotted pattern paper and eyeballed the size and adhered it!


As you can see I punched out all the small hearts and adhered them around the red circle.


A lot went on in this photo. I punched out more small hearts from different patterned paper in the Love Me pad. I then adhered them around the pink circle. As I said before I cut out three more creme circles. One has 3 hearts from the Stampin' Up! 3 hearts punch out of the dotted paper and adhered to the smallest creme circle. I added dimensionals to the back of the creme circle. I adhered it to the pink circle and then second creme circle onto the back of the pink circle. Now I adhered the red circle to that and the last creme circle to the back of the red circle.... Gosh! Sounds like a lot huh? If your confused comment and I can make a video how to make medallions.


So here I cut two pieces of creme cardstock and trimmed out a triangle at the end of both then I stamped my sentiments onto them in red ink. I adhered them under the medallion. You can round the corners if you like to.. but I decided not to. The medallion is the finishing touch! Enjoy! Keep staying tuned to the card challenge! Thanks!

Thursday, March 1, 2012

Pink Birthday Card


Here's another Birthday Card. It's an extremely simple birthday card. I didn't feel good today so I wanted to do a tutorial that was simple. If you guys want to see vidoes instead of pictures. Were also 10 followers away from a giveaway! Keep commenting and sharing your intrests. I always like to hear what you have to say.


Heres the supplies I used! : )

Stampin' Up! 3 Heart Punch
Stampin' Up! Corner Rounder
Kraft Cardstock
White Gel Pen
Light Pink Thread
Stampin' Up! Teeny Tiny Wishes
4 Different types of Pink Pattern Paper
Versa Mark Ink Pad
Zing! Clear Embossing Powder
Martha Stewart Heat Gun

Please comment below if you have any thoughts!


I made a standard cardstock size 4.5x5.5 and scored at 4.25. I cut 4 square pieces of patterned paper at 1-3/8x1-3/8. 


Here I rounded the corners of the four squares, but as you can see above, their rounded at opposite edges and the rounded corners are pointed in. Then I used my white gel pen to stich around the top right square. I had an extra creme heart in my scraps so I added dimensionals to it and adhered it to the top right square.


Here I cut a little slit in the crease for the string to wrap around the card. I wrapped the string about 2-3 times then tied it in a bow.


I stamped the bottom right of the card with the happy birthday sentiment in VersaMark ink and covered it in Zing! Clear Embossing Powder. Then I waved over this with a heat gun. Check out the tutorial at "The Basics" tab.


Here's the finished card! I hope you like it! I just went around the edge with my White Gel Pen and stitched it.

Thanks for reading! Please leave any comments!


Wednesday, February 22, 2012

Mothers Day Card

I know its early.. but its my mothers day card! I had a bunch of left over Stampin' Up! cardstock.
I'm uploading a video up on youtube. It's my first video! So check it out and give it a chance!

Supplies used:

Stampin' Up! Wild Wasabi Cardstock
Stampin' Up! Wild Wasabi ink pad
White cardstock
Yellow cardstock
Stampin' Up Word Window Punch
Stampin' Up! Modern Label Punch
Stampin' Up! Corner Rounder
ZING! white embossing powder
Martha Stewart heat gun
Inkadinkadoo 4 Piece butterfly Clear stamp
Martha Stewart Scoring Board


Hope you enjoy the video!!!


Monday, February 20, 2012

Paisley Birthday Card

Welcome back! I made a birthday card for my best friend today! And here's how it was done ; ) I also wanted to let you know that I will be making videos in a bit when I buy a camera stand. My old one broke : ( but no worries! I'm purchasing one soon! Enjoy the tutorial ; )


The supplies I used:
Stampin' Up! Word Window Punch
Stampin' Up Modern Label Punch
Ignore the 3 heart punch I decided to use the Stampin' Up 5 Petal Punch
Corner Rounder
Some matching ribbon
Stampin' Up Teeny Tiny Phrases Stamp Set
Brown ink
Purple, Blue, White Cardstock
Some Patterned Paper
Cuttlebug
Swiss Dot Embossing Folder

I cut a 8.5x11 Purple cardstock and scored it at 4 1/4 to creat a  standard 4 1/4x5.5. Then I took my patterend paper, isn't pretty?? I got it from hobby lobby a while back and I had to use it! But I cut that at 4 1/8 x 5 3/8. Then I adhered the two together.

I cut a piece of white cardstock 3x 2.5 and ran it through the cuttlebug between the swiss embossing folder! Idk about you but swiss dot is my favorite! It goes with everything!

Now I cut a piece of blue cardstock about 2.5x1 and then I corner rounded the white and blue cardstock edges!

This is my favorite punch set, Stampin' Up! Word Window Punch, and Modern Label Punch. I punched out of the purple cardstock with the Modern Label Punch, and then punched the Word Window Punch out of the white cardstock!

I used the Stampin' Up!  5 petal punch and punched out the Purple, white, and blue cardstock!
I tied a long piece of ribbon about 15 inches into a knot, for ribbon instructions, please comment below this tutorial if you'd like to see a ribbon tutorial video.

I adhered the white cardstock and added square dimensionals to the blue cardstock and place it close to the middle.

Lots happened here. I stamped the white punched out cardstock with Stampin' Up! Teeny tiny wishes stamp set in a brown ink and put dimensionals on the back of it. I adhered the purple modern label onto the blue and then put the word window punch on top. Now I put one square dimensional on the purple and blue flower. And I put TWO square dimensionals on the white flower.


 I placed the flowers at an appropraite distance! Enjoy your card! ; )


Saturday, February 18, 2012

Valentines Day Card


Hey everyone! Today I made my friend a belated birthday card, as you can tell her birthday is on Valentines Day! So I thought how appropriate for a Birthday Valentines Day themed card! ; ) Below are step by step instructions with pictures! Enjoy! : )

This are the supplies I used in the making of this card : ) You don't have to do the heat embossing if your not familiar with it though.
I used the following:
Stampin' Up! three heart punch
Stampin' Up word window punch
Stampin' Up Corner Rounder
Martha Stewart Scoring Board
Martha Stewart heat gun
Dark Red Textured Cardstock
Creme Cardstock
Kraft Cardstock
My Mind's Eye Love Me Patterened Paper
Stampabilities Cherry Red Ink Pad
Inkadinkado Clear Hearts Stamps
Clear Acrylic Block
ZING! Clear Embossing Powder
Some Square Dimensionals
Versa Mark Ink Pad
Now here's how to add them all together!


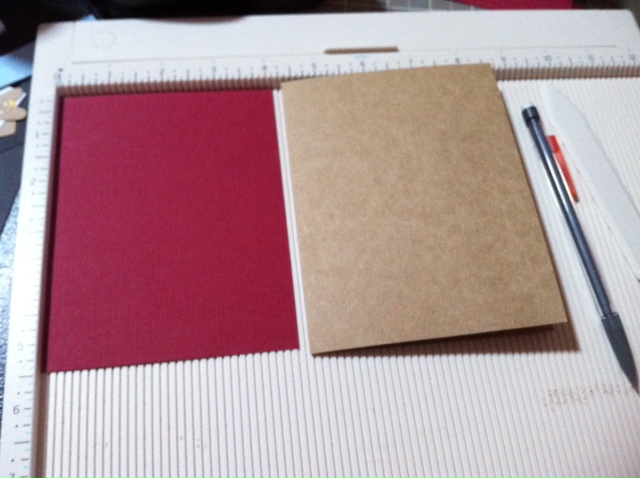
First cut the Kraft 8.5x11 cardstock to 8.5x5.5 and score at 4 1/4.


Cut the red cardstock at 4 1/8 x 5 3/8


Next take the extra cardstock and take your inkadinkadoo heart stamp set and I used the scribbled looking heart. Attach it the clear acrilyc block and cover the stamp with the Dark Cherry Stampabilities ink.


Stamp the Kraft cardstock and clean off the stamp with a wet cloth and remove the excess ink. Then stamp it with the Versa Mark ink pad.


Stamp over the previously stamped heart and then cover it with the clear embossing powder. Empty the extra powder back into the container. And tap off the little particles.


Using your heat emossing gun, let the white powder change before your eyes and the end product should look like the above picture.

Cut out the image, and round each of the corners.


Then take your Word Window Punch and Love Me Paper Pad and punch out the above image.


I punched out one of the hearts with the Stampin' Up! 3 heart punch from the Dark red textured cardstock.


Now cut the XOXO paper about an 1" bigger than the image. And then layer the creme cardstock underneath the XOXO paper cut it 1/4 bigger than the XOXO paper.


Now adhere the layers together..


This is what the base should look like now.


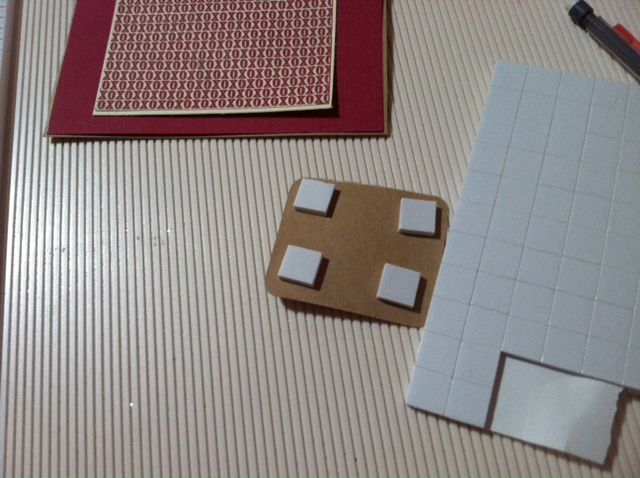
Put square dimensionals on the back of the Kraft cardstock and adhere it to the XOXO paper somewhere in the middle, the put the square dimensionals on the punch saying, and heart.