Showing posts with label Martha Stewart Circle Cutter. Show all posts

Thursday, May 3, 2012

Jar sentiment!


Here's today's card! I hope you like it! It's one of my favorites! I wanted to try something a little different. I didn't want the scrap paper from Teusday's card to go to waste so I decided to use the leftovers! ; ) I really enjoyed the outcome of this card.


Here's what's in the supplies basket today! : )

Dear Lizzy Paper Pad
Pink Cardstock
Kraft Cardstock
VersaMark Ink Pad
Modern Label Punch
Word Window Punch
Martha Stewart Circle Cutter
Teeny Tiny Wishes stamp
Dimensionals
Cuttlebug
Swiss Dot Embossing Folder
Zing! White Embossing Folder
Cream Grossgrain Ribbon

And there it is! And I also used my Martha Stewart Scoring board, and Heat Gun! : )


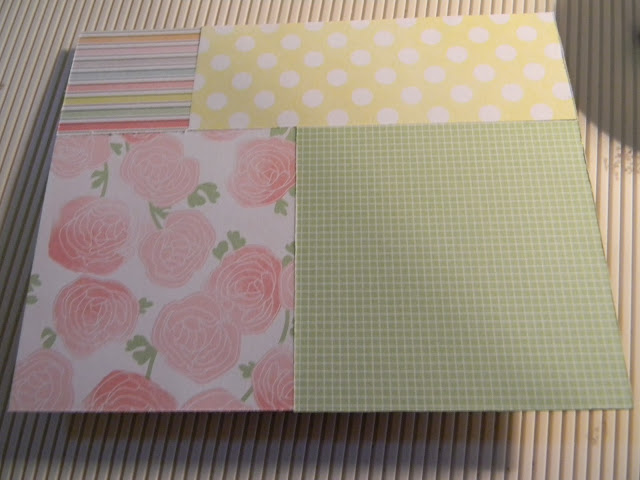
Here I used my standard card size again of Kraft Cardstock, 4-1/4x5-1/2. Then I cut some random square out of my scrap pattern paper. You can choose what ever size you want! 


As you can see here, I fit in the puzzle pieces of the pattern paper. I trimmed them to size and added a little something in the next step!


Here it is! I thought the lines looked a little out of place so I addhere some cream ribbon like so. 


I used my circle cutter to cut out a 3" pink circle. This circle cutter is really sharp, and I used my Cuttlebug B plate to cut it. 


I cranked the pink circle through my Swiss Dot Embossing Folder. 


Here I took the jar paper out of the Dear Lizzy Paper Pad. I cut out a random jar around the white edge.

I took some scrap kraft cardstock and made a little banner out of it then used my teeny tiny wish stamp sets and embossed the images.

I adhered the pink dry embossed circle on the intersections of the ribbon. Then I added dimensionals on the back of the jar and put it on the circle. I adhered the banner on the back of the jar.

This is another look at the card! I hope you liked todays card! : ) By the way! Today was nice and warm! IT reached 85 Degrees today! See you soon!

Wednesday, March 7, 2012

30 Day Challenge Day Card # 3 - Friend Medallion


Hey everyone, I decided to stick with the medallion theme today : ). I wanted to make this card a little more masculineish haha minus the hearts.. But I love the punch! hahaha! But any way enjoy the tutorial!


Ok here is the supplies! I forgot to add the heart punch in this oopsies! But it wasn't hard to make!

Little Black Dress 6x6 paper pad
Stampin' Up! Teeny Tiny Stamp Set
White Gel Pen
Stampin' Up! Corner Rounder
Stampin' Up! 3/4 Circle Punch
Stampin' Up! 3 Hearts Punch
Scallop Edge Scissors
Kraft Cardstock
Black Ink
Martha Stewart Circle Cutter

There you go! Oh! and a little disclaimer.. The Marth Stewart Circle punch I use takes some practice to get used to.. I'd suggest putting it on a cuttlebug B Mat where it's raised up. But also the cutter blade is super super sharp so just be Careful! : )


I cut a piece of Kraft Cardstock 1-1/8 x 5 inches. Then I used some of the assorted patterned paper from the paper pad I cut them into various strip sizes. I then added adhesive to the cardstock and layerd the strips of paper diagonally.


The result should look something like this! Finish all the way to the other end layering different patterns next to each other. Once that was finished I turned it around and cut the excess off.


I adhered the patterned design we just made on to the standard        4-1/2 x 5 Kraft cardstock. Then I eyeballed the size of the width of the black cardstock but the length of it is 5 inches long. I then used the scallop scissors and trimmed the edge. I layered it over the strips of paper and adhered it down.


With the Martha Stewart Circle Cutter I cut out the creme patterned paper from the paper pad. The size of the circle is 2-7/16 And then with my circle punch I punched out a bunch of circles. I added adhesive to the edge of the circle and added then all around the edge on the back.


This is what the finished medallion should look like : )


Now add the medallion to the card and trim the edge of the piece hanging off the card.


I stamped in black ink this sentiment.


Finally I punched out hearts and adhered it to the middle of the medallion. I rounded the top orners of the card. Lastly I added some white stitching to the card. I hope you enjoy this card as much as I did! Thanks for tuning in! : )

Stay tuned in for 26 more days of cards!


Tuesday, March 6, 2012

30 Day Challenge Card #2 - Heart Medallion


Afternoon everyone! Today was a beautiful day and it was so sunny and spring is finally here! I'm so excited and happy! So I hope you enjoy this card! Read on for more!


So today! I used these supplies!

Martha Stewart Circle Cutter
Love Me Paper Pad
Stampin' Up! Corner Rounder
Stampin' Up! 3 Hearts Punch
Creme Cardstock
Red Ink Pad
Sentiment of your choice

That's it! : )


Here I cut out 2 circles. The red circle is 2.5 inches and the pink circle is cut at 2 inches. But I decided to cut out 3 more creme circles to off set the hearts I'll be adhering to the circles. One is two sizes smaller than the pink circle, the second one is two sizes larger than the pink circle, and the thrid creme circle is two sizes larger than the red circle. Sorry for the confusion!

I punched out little hearts with my 3 Hearts Punch, I used the zig zag pattern in the Love Me Pad.


Here I took the dotted pattern paper and eyeballed the size and adhered it!


As you can see I punched out all the small hearts and adhered them around the red circle.


A lot went on in this photo. I punched out more small hearts from different patterned paper in the Love Me pad. I then adhered them around the pink circle. As I said before I cut out three more creme circles. One has 3 hearts from the Stampin' Up! 3 hearts punch out of the dotted paper and adhered to the smallest creme circle. I added dimensionals to the back of the creme circle. I adhered it to the pink circle and then second creme circle onto the back of the pink circle. Now I adhered the red circle to that and the last creme circle to the back of the red circle.... Gosh! Sounds like a lot huh? If your confused comment and I can make a video how to make medallions.


So here I cut two pieces of creme cardstock and trimmed out a triangle at the end of both then I stamped my sentiments onto them in red ink. I adhered them under the medallion. You can round the corners if you like to.. but I decided not to. The medallion is the finishing touch! Enjoy! Keep staying tuned to the card challenge! Thanks!