Tuesday, March 27, 2012
Sorry for the absence...
Hey everyone,
Sorry for the absence I have been jumping through tons of hoops and loops lately. I have had no time to craft or create my cards or scrapbook. It's made me sad! But I have some good news! I purchased a cricut! Along with the create a critter cart. I'm so so excited! The card challenge will continue! Thank you for everything! I also decided due to my poll at the bottom I will be giving away inkadinkado products that I will personally purchase and send to you guys for the giveaway. Thanks everyone!
See you soon!
Wednesday, March 14, 2012
30 Day Challenge Card # 8 - Everyday Card

Hello everyone! Here's today's card! I wanted to show you a fun shadowing technique that you can use with punched items and die cuts! Have fun reading on!

This is the supplie I used for today! I was testing out my lighting and it was kinda off so sorry for that!!
Stampin' Up! Heart Punch
Stampin' Up! Corner Rounder
EK Succes Heart border punch
Pink Cardstock
Dear Lizzy Paper Pad- Neopolitan
White Gel Pen
Dimensionals

Here I cut the Floral paper 1-1/8 x 5-6/8 and then I trimmed some polka dot paper 1-7/8 x 5-6/8. Then I trimmed the pink cardstock anny x 5-6/8.

Next I punched out 6 hearts. 3 in the floral pattern and 3 in the pink cardstock. I added small dimensionals on the front of the 3 floral hearts.

Now I added the pink hearts on top of the floral hearts.

Here I trimmed the pink cardstock with my heart border punch and adhered it to the back of the floral paper. Then I adhered the polka dot paper on the back of the floral and rounded the corners.
This is what the finished card should look like! Just adhere the 3 hearts virtically and adhere the design you just made to the card! You could add some white stiching if you'd like I wanted to bring the white out a little more in the card! Thanks for tuning in!
Tuesday, March 13, 2012
30 Day Card Challenege Card # 7- Thank you

Here's the card today! A friend of mine made me some Cherry Chesecake and I wanted to make her a thank you card for her!

Here I used
My Mind's Eye Stamp Set
My Mind's Eye Dolled Up Paper Pad
Cosmo Cricut Paper pad
Stampin' Up! Wild Wasabi Ink Pad
Kraft Cardstock
Stampin' Up! 5 Petal Punch

Here I used the standard 4-1/4x5-1/2 and turned it hot dog style. Now I cut some patterned paper from My Mind's Eye paper pad the polka dot which is trimmed to fit the card. Then the yellow patterned paper is trimmed a couple sizes smaller I eyeballed it ; ). Then I cut some green plaid paper and trimmed Kraft cardstock.

Here you can put it all together place it closer to the top and leave some space at the bottom : ).

I added some white stiching around the kraft cardstock. And I used some Thank You stamp sentiment I had lying around. I stamped it in Wild Wasabi.

I punched out these flowers and adhered it onto the card. The smaller polka dot is on the back of the larger polka dot! I hope you enjoyed this tutorial! See you tomorrow!
30 Day Challenge Card #6 - Floral Friend

As you know I don't do cards on the weekend! But due to the Sun Flares recently my internet and computer along with all my electronics have been acting wacky so I'm sorry for no card yesterday I couldn't get in to post it! Dang electronics! Any way! Here's yesterdays card!

Here's what I used!!
Kraft Cardstock
White Gel Pen
Stampin' Up! 3 Hearts Punch
Corner Rounder
Cosmo Cricut Floral Paper Pad
Let's get started!!

Here I used the standard 4-1/4x5-1/2 and then I cut a piece of floral pattern paper from the Cosmo Cricut pad if you eyeball it the paper should look something like above. Then I rounded the corners of the inside pattern paper and the card itself. But I only did the top left and bottom right corners.

Basically I did eyeball this again, but I trimmed the kraft cardstock 1-1/2x 3-5/8. I then added some dimensional adhesive to the back of it.

Here I used my heart punch and punched out four hearts out of two different pieces of patterned paper from the Cosmo Cricut paper pad again. I then adhered them vertically down the center of the Kraft square. Also place the kraft square higher on the card and leave a little space for a sentiment.

I added some stitching down the middle of the hearts, and then around the entire card. Next I used the My Minds Eye Clear Stamp Set and used some black ink. And that's it! Simple and easy!! Thanks for tuning in!
Friday, March 9, 2012
30 Day Card Challenge Card # 5 - LOVE Pattern

Ok so this was today's card plan! I decided to make something a little easier! It's so easy you'll be like 'Shut the Front Door!' easy. So let's get started!!

Here are the supplies used.. but ignore the pink ribbon again! I used red organza ribbon instead!
Stampin' Up! Heart Punch
Red Gems
Red Organza Ribbon
Love Me Paper Pad
Red Cardstock
Keep reading for the tutorial! : )
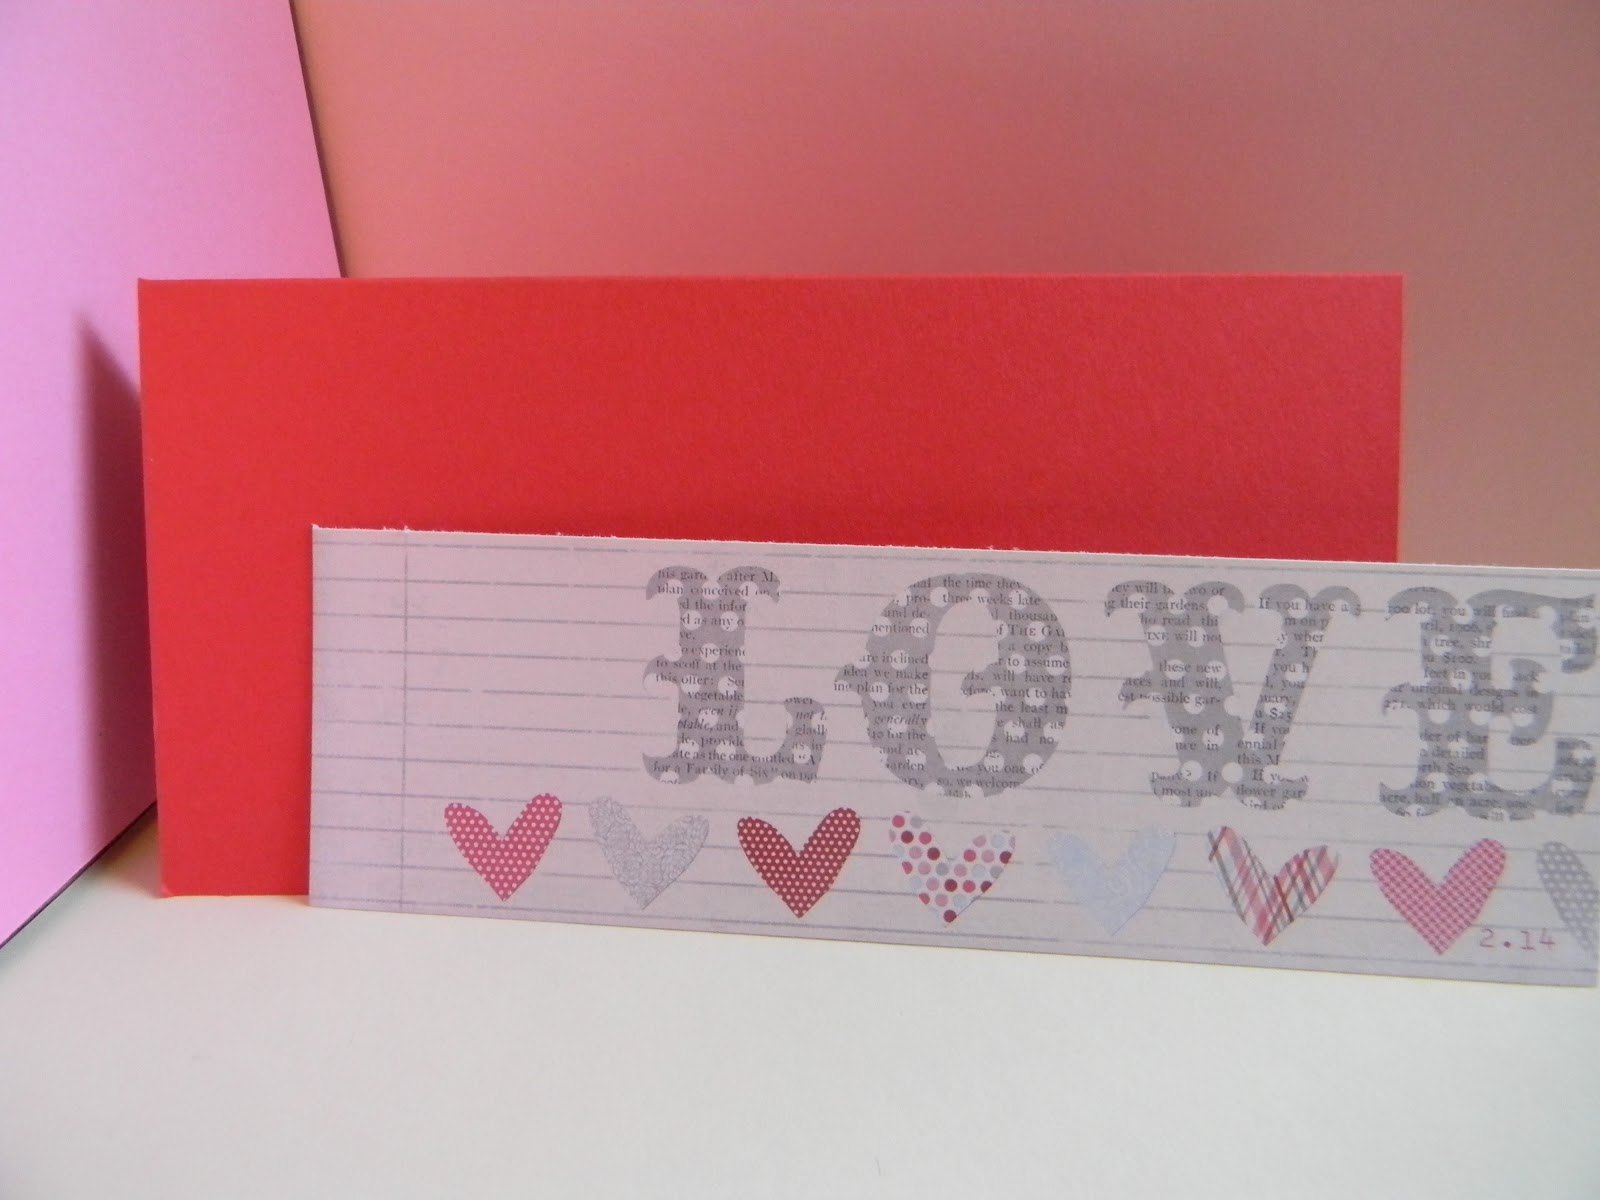
Ok so the LOVE is from the LOVE ME paper pad and I just cut it out. The paper pad is 6x6 so I made my base cardstock 3x6 or I cut it out at 6x6 and scored at 3". So I just trimmed the LOVE and adhered it to the card.

Here I used patterned paper from the same paper pad that matched the hearts under the LOVE. I cut it 1-1/8x6 and adhered it above the LOVE.

I cut the red organza ribbon at 7-1/2 and wrapped it around the card just above the line of paper.

Here I punched out with my Heart Punch the above pattern and added a dimensional to the back. The I put the smaller red gem on the heart and addhered it to the blank space of the card.
Thanks for tuning in! Ill see you tomorrow!! : )
30 Day Challenge Card # 4- Hello Baby

Hey everyone! I'm back! My mouth is still sore from the surgery.. but I'm so happy to show you two cards today! Their so simple and fun at the same time! I hope you enjoy them!

Here are the supplies I used minus the string.. I decided not to use it when I took this picture.. : )
Stampin' Up 5 Petal Punch
Stampin' Up! Word Window Punch
Stampin' Up! Modern Label Punch
Ek Succes 2" Scallop Circle
Stampin' Up! Teeny Tiny Wishes Stamp Set
White Gel Pen
Dark Pink Cardstock
Light Pink Cardstock
Baby Pattern Paper
Cuttlebug
Cuttlebug Swiss Dot Embossing Folder
Dimensionals
Now Let's Get Started!!

Here I cut a base creme cardstock 4x8 and I cut some baby pattern paper 4x4. Dark pink cardstock 3-5/8 and light pink cardstock 3-1/8.

Here I punched out the flower in dark pink cardstock and cut it at the two petals and 3 petals. This will be the sheeps head/ears and legs.

Out of the creme cardstock I punched a scallop circle and ran it through my swiss dot Cuttlebug embossing folder. The I took the legs of the sheep or the two petals and adhered it to the back of the scalloped circle.

Now take the face and add some dimmensionals to the back and using the white gel pen put two dots for the eyes : ) and place it in the middle of the body.

Here's the end product! I added some white stiching around the dark pink cardstock. I added the sheep to the middle, isn't he cute!? I then Stamped in black ink the sentiment 'hello baby' and punched it out in light pink cardstock on the word window punch. And then I punched out with modern label punch in dark pink cardstock.
Thanks for tuning in!
Thursday, March 8, 2012
No Card Today..
Unfortunately I went to the dentist today and I needed some oral surgery. For recovery Im not making a card tonight. But to make up for missing today there will be two card tutorials tomorrow. So sorry for the inconvenience. Hope to be card making as soon as possible. Tune in tomorrow for more cards!
Wednesday, March 7, 2012
30 Day Challenge Day Card # 3 - Friend Medallion

Hey everyone, I decided to stick with the medallion theme today : ). I wanted to make this card a little more masculineish haha minus the hearts.. But I love the punch! hahaha! But any way enjoy the tutorial!

Ok here is the supplies! I forgot to add the heart punch in this oopsies! But it wasn't hard to make!
Little Black Dress 6x6 paper pad
Stampin' Up! Teeny Tiny Stamp Set
White Gel Pen
Stampin' Up! Corner Rounder
Stampin' Up! 3/4 Circle Punch
Stampin' Up! 3 Hearts Punch
Scallop Edge Scissors
Kraft Cardstock
Black Ink
Martha Stewart Circle Cutter
There you go! Oh! and a little disclaimer.. The Marth Stewart Circle punch I use takes some practice to get used to.. I'd suggest putting it on a cuttlebug B Mat where it's raised up. But also the cutter blade is super super sharp so just be Careful! : )

I cut a piece of Kraft Cardstock 1-1/8 x 5 inches. Then I used some of the assorted patterned paper from the paper pad I cut them into various strip sizes. I then added adhesive to the cardstock and layerd the strips of paper diagonally.

The result should look something like this! Finish all the way to the other end layering different patterns next to each other. Once that was finished I turned it around and cut the excess off.

I adhered the patterned design we just made on to the standard 4-1/2 x 5 Kraft cardstock. Then I eyeballed the size of the width of the black cardstock but the length of it is 5 inches long. I then used the scallop scissors and trimmed the edge. I layered it over the strips of paper and adhered it down.

With the Martha Stewart Circle Cutter I cut out the creme patterned paper from the paper pad. The size of the circle is 2-7/16 And then with my circle punch I punched out a bunch of circles. I added adhesive to the edge of the circle and added then all around the edge on the back.

This is what the finished medallion should look like : )

Now add the medallion to the card and trim the edge of the piece hanging off the card.

I stamped in black ink this sentiment.
Finally I punched out hearts and adhered it to the middle of the medallion. I rounded the top orners of the card. Lastly I added some white stitching to the card. I hope you enjoy this card as much as I did! Thanks for tuning in! : )
Stay tuned in for 26 more days of cards!
Tuesday, March 6, 2012
30 Day Challenge Card #2 - Heart Medallion

Afternoon everyone! Today was a beautiful day and it was so sunny and spring is finally here! I'm so excited and happy! So I hope you enjoy this card! Read on for more!

So today! I used these supplies!
Martha Stewart Circle Cutter
Love Me Paper Pad
Stampin' Up! Corner Rounder
Stampin' Up! 3 Hearts Punch
Creme Cardstock
Red Ink Pad
Sentiment of your choice
That's it! : )

Here I cut out 2 circles. The red circle is 2.5 inches and the pink circle is cut at 2 inches. But I decided to cut out 3 more creme circles to off set the hearts I'll be adhering to the circles. One is two sizes smaller than the pink circle, the second one is two sizes larger than the pink circle, and the thrid creme circle is two sizes larger than the red circle. Sorry for the confusion!

I punched out little hearts with my 3 Hearts Punch, I used the zig zag pattern in the Love Me Pad.


Here I took the dotted pattern paper and eyeballed the size and adhered it!

As you can see I punched out all the small hearts and adhered them around the red circle.

A lot went on in this photo. I punched out more small hearts from different patterned paper in the Love Me pad. I then adhered them around the pink circle. As I said before I cut out three more creme circles. One has 3 hearts from the Stampin' Up! 3 hearts punch out of the dotted paper and adhered to the smallest creme circle. I added dimensionals to the back of the creme circle. I adhered it to the pink circle and then second creme circle onto the back of the pink circle. Now I adhered the red circle to that and the last creme circle to the back of the red circle.... Gosh! Sounds like a lot huh? If your confused comment and I can make a video how to make medallions.
So here I cut two pieces of creme cardstock and trimmed out a triangle at the end of both then I stamped my sentiments onto them in red ink. I adhered them under the medallion. You can round the corners if you like to.. but I decided not to. The medallion is the finishing touch! Enjoy! Keep staying tuned to the card challenge! Thanks!
Subscribe to:
Posts (Atom)