Wednesday, February 29, 2012

Cheetah Birthday Card


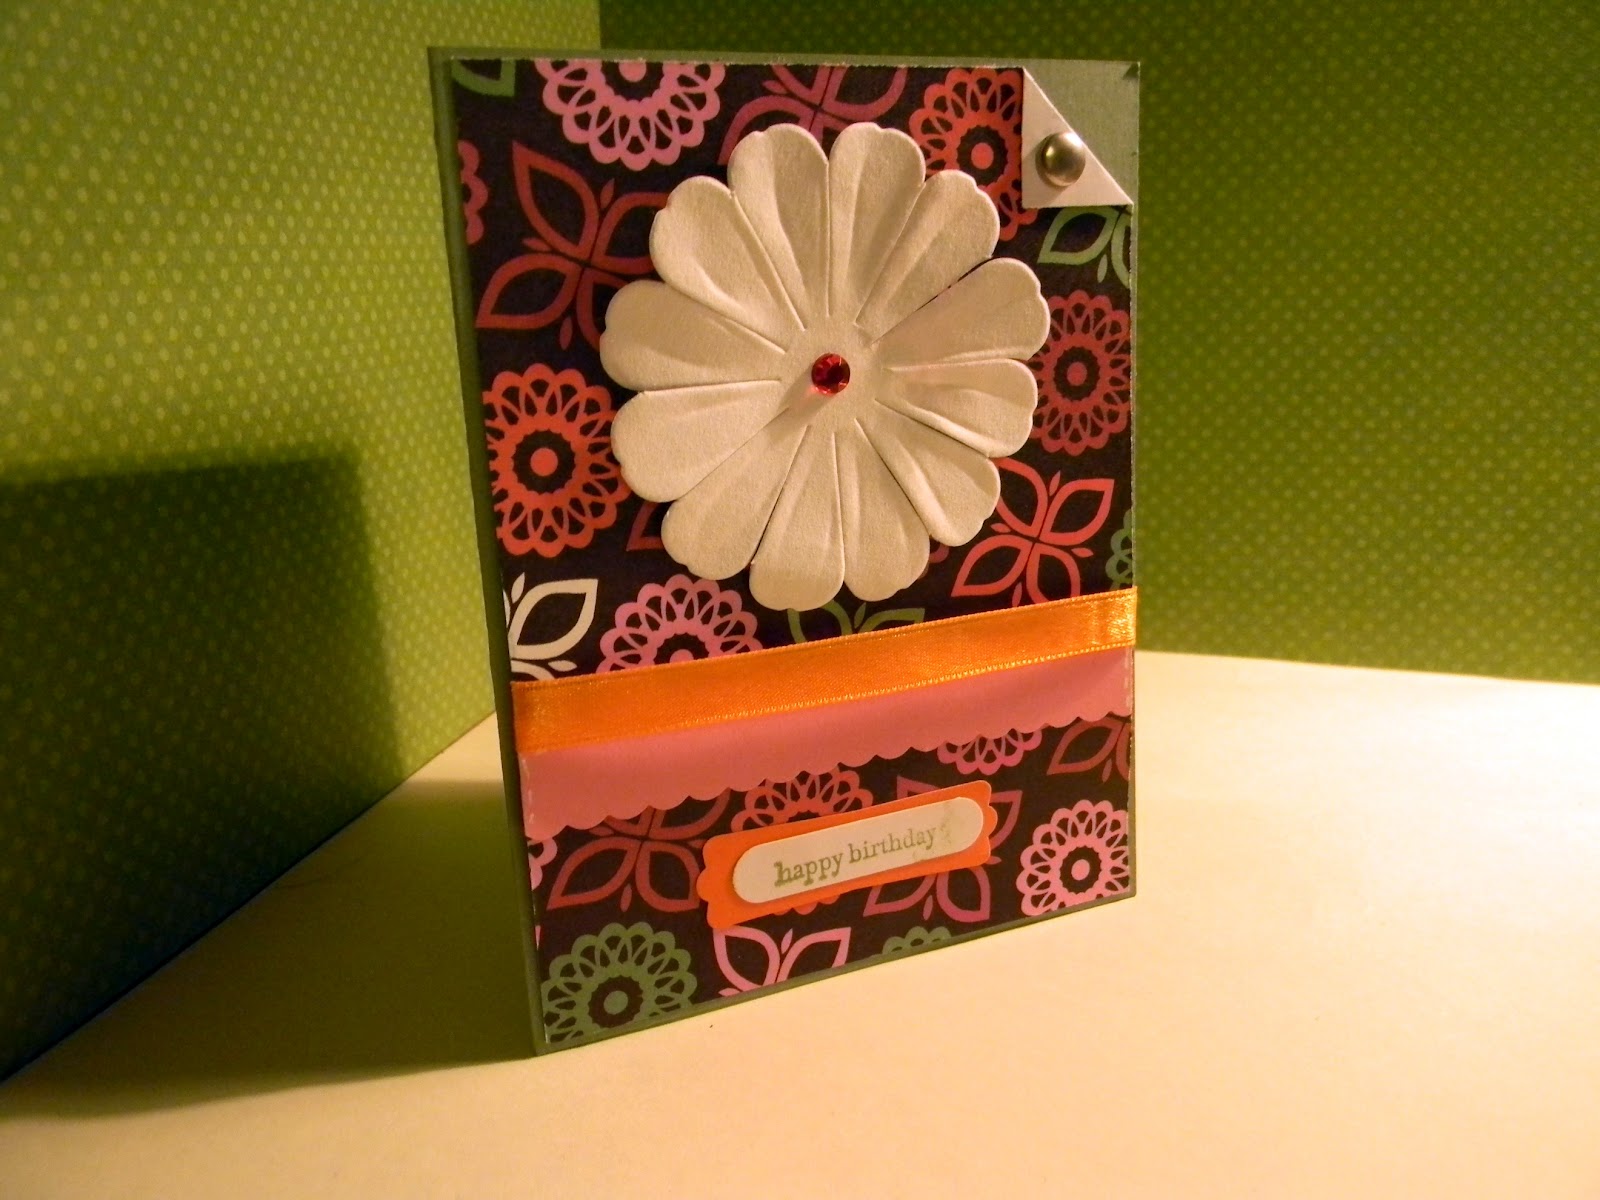
Hey everyone! I have so many friend birthdays coming up in the next month I wanted to make cards for them! This one was designed for my friend who loves Cheetah : )


Heres a list of supplies I used for the card! And up above is a visual list. : )

Stampin' Up! Corner Rounder
Stampin' Up! Word Window Punch
Stampin' Up Modern Label Punch
Stampin' Up! 3 Hearts Punch
Scallop edged scissors
Kraft Cardstock
Creme Cardstock
Black Cardstock
Patterned Paper (Cheetah)
Creme Ribbon
White Gel Pen
Black Ink
Teeny Tiny Wishes Stamp Set

Enjoy!!


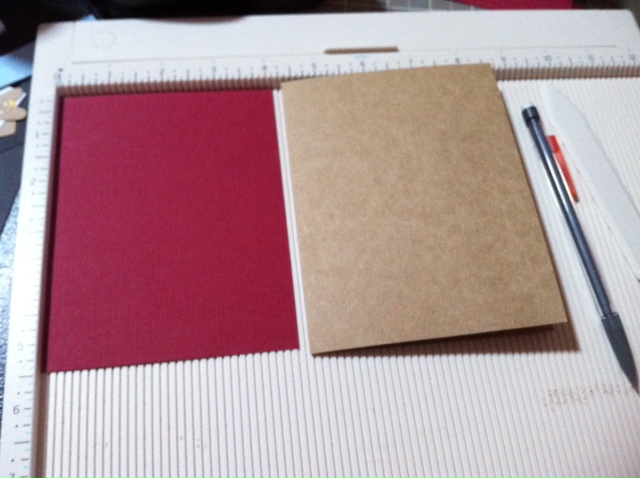
Here I started with my Kraft cardstock base and its a standard size at 4.25x5.5. Then if you can see up above I marked with pencil on the creased side about .75 on either side. Then I cut the patterned papper to fit between the marks. I cut the Cheetah at about 3.5 and rounded the corners on the right side top and bottom of the card base and Cheetah print.


I punched out black hearts with my Stampin' Up! 3 Heart Punch, and Punched out black with the Modern Label, and creme with the Word Window Punch. I stamped the Happy Birthday sentiment in black on the creme cardstock. I added dimensionals to the creme cardstock and 3 hearts.


I trimmed black cardstock strip to size of the card, .5x4.25. Then I trimmed it with my scallop border. I adhered the Cheetah paper to the base and the closer to the bottom of the Cheetah paper I adhered the scalloped paper. Here I cut into the crease of the card with scissors so I could thread my creme ribbon.


Adhere the ribbon to the back of the card front and adhere the black hearts and sentiment. Lastly I added some white stiching to the side of the cheetah paper. I hope you enjoyed this card and tune in for some more ideas! Keep Scrapin!


Monday, February 27, 2012

Simple and Easy St. Patricks Day Card


Hey everyone! I decided to make this week devoted to St. Patricks Day Cards. Of course you can use these ideas for other occasions.. but this card is extremely simply and easy to make!! Enjoy!


Here are the supplies! As you can see it's simple and easy!

Stampin' Up! Wild Wasabi Ink Pad
Stampin' Up! Teeny Tiny Wishes Stamp Set
Stampin' Up! Corner Rounder Punch
All Natural Hemp - Tan (You can use an twine or string you'd like)
Creme cardstock base
3 Pieces of scrap green patterend paper
White Gel Pen
Oh SNAP! I forgot to add in the Scallop Scissors I've used on previous tutorials. Sorry!
Let's Get Started!


The cardstock base is different from my usual. The creme is trimmed at 4.5x11 and scored at 5.5. There are four strips of different pieces of patterned paper. I just cut the three at 1.5x 3.5. Then I used some scrap 12x12 piece of Wild Wasabi Polka Dot by BoBunny. For the strip in the middle of the card, I used the plain back of the polka dot cardstock.

Now I trimmed the green cardstock with the scallop edge scissors and adhered it to the card. I believe this was measured at 2.5x4. Now I cut three little slits into the side on each side for the hemp.


Here I tied the string. Leave a comment if you want to see how I did tied the hemp. But I stamped Happy St. Patricks Day down at the corner in Wild Wasabi Ink and I added white gel pen stitching on the card. Thanks for reading! Keep on Scrapin!


Sunday, February 26, 2012

St. Patricks Day Card

Hey everyone! Welcome and Welcome back! : ) I'm so excited to show you this card! I just remembered to make this! I forgot all about St. P's day and I wanted to make this for you! Enjoy!


This picture show what suplies I used for this card.. Looks like a lot I know.. but its worth it ; )

Martha Stewart Heat Gun
Thin Sharpie Marker - black
Craft Border scissors
Hole Punch
3/4 inch Stampin' Up! circle punch
Stampin' Up! 3 Hearts Punch
Stampin' Up! Modern Label Punch
Stampin' Up! Word Window Punch
Teeny Tiny Wishes Stamp Set
Stampendous Heat n' Bond Powder
Marth Stewart Loose Glitter, Gold
Stampin' Up! Wild Wasabi Ink Pad
Stampin' Up! Wild Wasabi Cardstock
White Cardstock
Scoring Board
Cuttlebug
Cuttlebug embossing folder Swiss Dots
Square Dimensionals
VersaMark ink pad

LET'S GET STARTED!


Here I used Wild Wasabi as my card base and its standard card size 5.5x8.5 scored at 4.25. Then I trimmed white cardstock to 4 1/8 x 5 3/8 and I trimmed wild wasabi at 4 x 5 1/8 and white cardstock at 3.75x4 7/8.


Here I used my Cuttlebug and ran the first white cardstock layer through it with the Swiss Dot Embossing Folder. Next I trimmed the corners with my decoartive scissors on both the Wild Wasabi and next layer white cardstock. I adhere these two together.

Here I punched out Wild Wasabi hearts four times.

I heat embossed and used my glitter to make it gold. To see how I did this check out "The Basics" Tab up at the top to see the tutorial.


Here I punched out two larger circles and one small circle with my hole punch.


Now I arranged the Clovers in a specific way and place the gold glittery dots on top. And Then I adhered all layers together, and the clovers too.

I punced out with my Modern Label Wild Wasabi and Word Window Punch and Stamped with my Wild Wasabi St. Patricks Day Stamp on the white cardstock and added dimmensionals to the white cardstock.


I added dimensionals to the two large circles for the final product and here it is! Remember check the video on embossing at 'The Basics" Tab at the top.

Keep Scrapin!


Friday, February 24, 2012

Youtube channel! Subscribe!

Hey everyone!
I recently made a youtube channel if you couldn't tell from my previous video. But I have decided that I will be making tutorials only for card making basics. The legit card making will be the detailed photos like I have usually been doing. I've been getting positive feedback from them so I'm glad to see you enjoy the tutorials!
Also I will be giving away Stampin' Up markers! Were so close to that 50 member mark! Get ready! Details are coming soon on how to win! Thanks everyone and keep SCRAPIN'!

Thursday, February 23, 2012

Floral Birthday Card


Hey everyone! I decided to use some scrap paper instead of new paper! Make this a challenge for everyone to make a card with scrap paper! ; ) Enjoy the tutorial! Also I tried a new photo technique hope you like it!

 Here's the supplies I used.. but I forgot to put in the craft sisccors I used in the later pictures and some red jewels.

Stampin' Up! Modern Label Punch
Stampin' Up! Word Window
Stampin' Up! Teeny Tiny Wishes Stamp Set
Scrap orange ribbon
Pattern paper from The Paper Studio
Pewter Brad from The Paper Studio
Scrap White Cardstock
Scrap Stampin' Up! Wild Wasabi Cardstock
Scrap Pink Cardstock
Scrap Orange Cardstock
Stampin' Up! Wild Wasabi Ink Pad


I cut the Wild Wasabi at a standard card size of 4.25x5.5, then I trimmed the pattern paper 4 1/8 x 5 3/8. Then I folded the corner of my pattern paper and used a hole punch for the brad. This is a large pewter brad, and I wouldn't suggest this size hole punch with smaller size brads.


Next, I trimmed some pink cardstock with some craft scallop edge sisccors, I figured why not? I found these in my collest! No one uses these anymore. It looks pretty spiffy to me ; ). I trimmed the pink to fit the pattern cardstock and adhered this to the top layer.


 Next I added some white stitching around the pink... I would discard that part.. bad descion on my behalf : ). But I just cut some scrap orange satin ribbon to size and adhere this to the back of the patterned paper and adhered the paper to the wild wasabi.
 
 Now I used these two
punches and punched
out the white with the Word Window and Orange with Modern Label.


Here I used a left over paper flower from The Paper Studio and I adhere this to the card. Then I put a small red gem on the middle of the flower. I also stamped the white cardstock with teeny tiny wishes stamp with the Wild Wasabi ink pad and adhered it on the orange punch. Then adhere them to the card at the bottom.


Here's the finished product! Thanks for reading!


Wednesday, February 22, 2012

UPDATE!

Since I am new to making videos.. I will still be posting step by step instructions with pictures!

Also giveaway update! I will be giving away some Stampin' Up! Products to the first 50 members! Everyone signed up already should email me if you haven't already to be randomly selected for the giveaway! More updates soon! Keep Scrapin'

Mothers Day Card

I know its early.. but its my mothers day card! I had a bunch of left over Stampin' Up! cardstock.
I'm uploading a video up on youtube. It's my first video! So check it out and give it a chance!

Supplies used:

Stampin' Up! Wild Wasabi Cardstock
Stampin' Up! Wild Wasabi ink pad
White cardstock
Yellow cardstock
Stampin' Up Word Window Punch
Stampin' Up! Modern Label Punch
Stampin' Up! Corner Rounder
ZING! white embossing powder
Martha Stewart heat gun
Inkadinkadoo 4 Piece butterfly Clear stamp
Martha Stewart Scoring Board


Hope you enjoy the video!!!


Tuesday, February 21, 2012

GIVEAWAY!

Hey everyone! I wanted to let you know that I'm going to be doing a giveaway for the first 50 members! If you could adverstise this blog a little more we can get this giveaway rolling along! Thank you! Videos coming soon! ; )

Monday, February 20, 2012

Paisley Birthday Card

Welcome back! I made a birthday card for my best friend today! And here's how it was done ; ) I also wanted to let you know that I will be making videos in a bit when I buy a camera stand. My old one broke : ( but no worries! I'm purchasing one soon! Enjoy the tutorial ; )


The supplies I used:
Stampin' Up! Word Window Punch
Stampin' Up Modern Label Punch
Ignore the 3 heart punch I decided to use the Stampin' Up 5 Petal Punch
Corner Rounder
Some matching ribbon
Stampin' Up Teeny Tiny Phrases Stamp Set
Brown ink
Purple, Blue, White Cardstock
Some Patterned Paper
Cuttlebug
Swiss Dot Embossing Folder

I cut a 8.5x11 Purple cardstock and scored it at 4 1/4 to creat a  standard 4 1/4x5.5. Then I took my patterend paper, isn't pretty?? I got it from hobby lobby a while back and I had to use it! But I cut that at 4 1/8 x 5 3/8. Then I adhered the two together.

I cut a piece of white cardstock 3x 2.5 and ran it through the cuttlebug between the swiss embossing folder! Idk about you but swiss dot is my favorite! It goes with everything!

Now I cut a piece of blue cardstock about 2.5x1 and then I corner rounded the white and blue cardstock edges!

This is my favorite punch set, Stampin' Up! Word Window Punch, and Modern Label Punch. I punched out of the purple cardstock with the Modern Label Punch, and then punched the Word Window Punch out of the white cardstock!

I used the Stampin' Up!  5 petal punch and punched out the Purple, white, and blue cardstock!
I tied a long piece of ribbon about 15 inches into a knot, for ribbon instructions, please comment below this tutorial if you'd like to see a ribbon tutorial video.

I adhered the white cardstock and added square dimensionals to the blue cardstock and place it close to the middle.

Lots happened here. I stamped the white punched out cardstock with Stampin' Up! Teeny tiny wishes stamp set in a brown ink and put dimensionals on the back of it. I adhered the purple modern label onto the blue and then put the word window punch on top. Now I put one square dimensional on the purple and blue flower. And I put TWO square dimensionals on the white flower.


 I placed the flowers at an appropraite distance! Enjoy your card! ; )


Saturday, February 18, 2012

Valentines Day Card


Hey everyone! Today I made my friend a belated birthday card, as you can tell her birthday is on Valentines Day! So I thought how appropriate for a Birthday Valentines Day themed card! ; ) Below are step by step instructions with pictures! Enjoy! : )

This are the supplies I used in the making of this card : ) You don't have to do the heat embossing if your not familiar with it though.
I used the following:
Stampin' Up! three heart punch
Stampin' Up word window punch
Stampin' Up Corner Rounder
Martha Stewart Scoring Board
Martha Stewart heat gun
Dark Red Textured Cardstock
Creme Cardstock
Kraft Cardstock
My Mind's Eye Love Me Patterened Paper
Stampabilities Cherry Red Ink Pad
Inkadinkado Clear Hearts Stamps
Clear Acrylic Block
ZING! Clear Embossing Powder
Some Square Dimensionals
Versa Mark Ink Pad
Now here's how to add them all together!


First cut the Kraft 8.5x11 cardstock to 8.5x5.5 and score at 4 1/4.


Cut the red cardstock at 4 1/8 x 5 3/8


Next take the extra cardstock and take your inkadinkadoo heart stamp set and I used the scribbled looking heart. Attach it the clear acrilyc block and cover the stamp with the Dark Cherry Stampabilities ink.


Stamp the Kraft cardstock and clean off the stamp with a wet cloth and remove the excess ink. Then stamp it with the Versa Mark ink pad.


Stamp over the previously stamped heart and then cover it with the clear embossing powder. Empty the extra powder back into the container. And tap off the little particles.


Using your heat emossing gun, let the white powder change before your eyes and the end product should look like the above picture.

Cut out the image, and round each of the corners.


Then take your Word Window Punch and Love Me Paper Pad and punch out the above image.


I punched out one of the hearts with the Stampin' Up! 3 heart punch from the Dark red textured cardstock.


Now cut the XOXO paper about an 1" bigger than the image. And then layer the creme cardstock underneath the XOXO paper cut it 1/4 bigger than the XOXO paper.


Now adhere the layers together..


This is what the base should look like now.


Put square dimensionals on the back of the Kraft cardstock and adhere it to the XOXO paper somewhere in the middle, the put the square dimensionals on the punch saying, and heart.